Windows SignTool Integration
Windows SignTool Integration
Section titled “Windows SignTool Integration”Use Microsoft SignTool to sign Windows executables (.exe, .dll, .sys) through the QCecuring platform.
QCecuring integrates with SignTool using the Windows Key Storage Provider (KSP) and the local Signing Agent.
All private keys remain protected inside the QCecuring platform.
The KSP forwards signing operations securely through the agent to the backend.
Architecture Overview
Section titled “Architecture Overview”SignTool → QCecuring KSP → Signing Agent → QCecuring Platform → HSM / KMSPrerequisites
Section titled “Prerequisites”Before proceeding:
- QCecuring Platform is running
- Signing Agent is installed and running
- QCecuring Windows KSP is installed
- A code signing certificate exists in the platform
- You have the associated Key ID
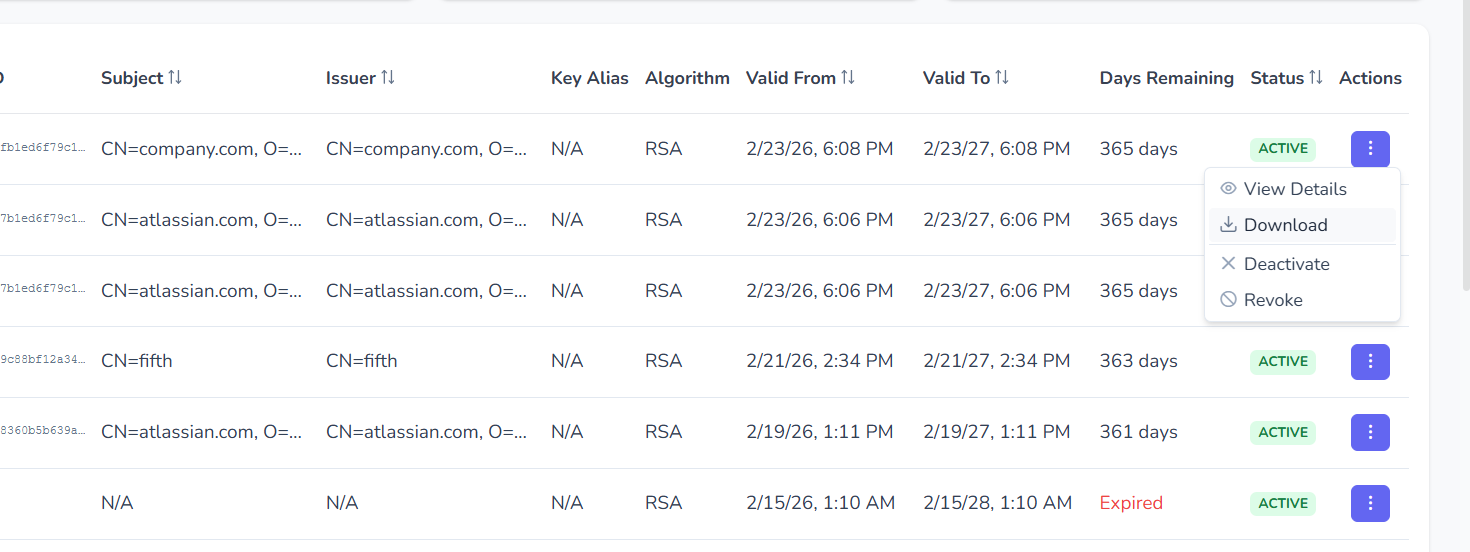
Step 1 — Download Certificate from QCecuring UI
Section titled “Step 1 — Download Certificate from QCecuring UI”- Navigate to Certificates in the QCecuring UI.
- Select the certificate associated with your signing key.
- Download the certificate file (
.cer). - Note the Key ID associated with that certificate.
Copy the certificate file to your working directory.
Step 2 — Import & Link Certificate to QCecuring KSP
Section titled “Step 2 — Import & Link Certificate to QCecuring KSP”Run:
.\import-link-cert.ps1 -CertPath .\codesign.cer -KeyId <YourKeyId>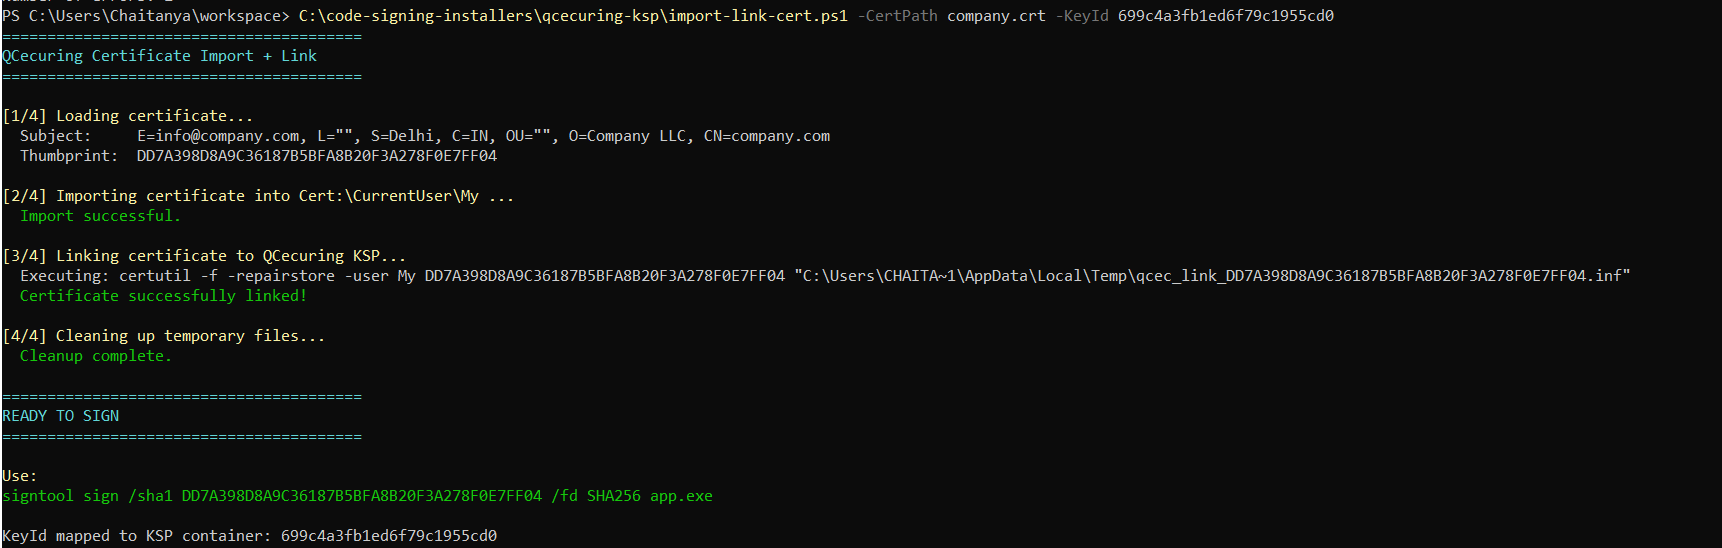
You should see:
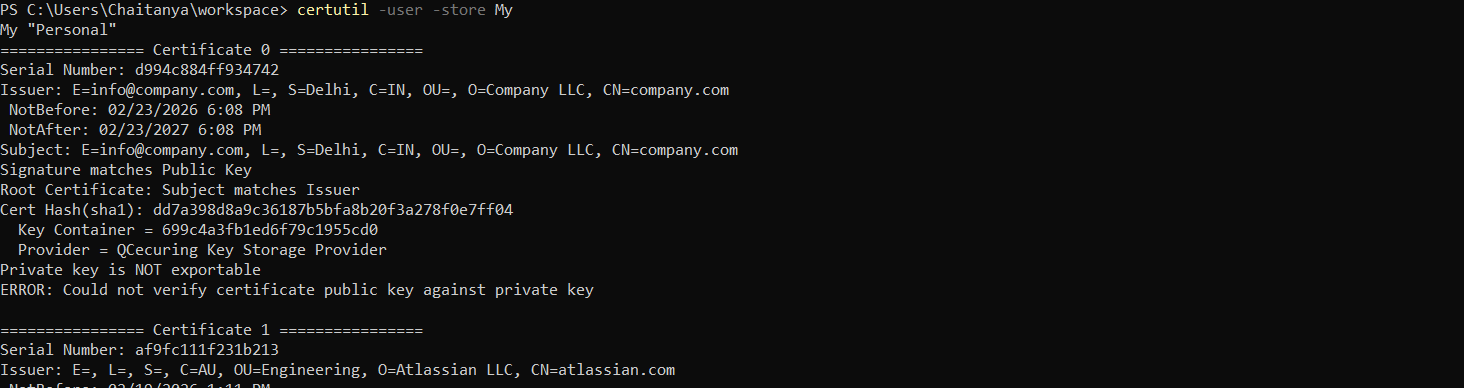
Certificate successfully linked!READY TO SIGNStep 3 — Verify Certificate is Linked
Section titled “Step 3 — Verify Certificate is Linked”Run:
certutil -user -store MyConfirm:
- Certificate appears in the store
- Provider is:
QCecuring Key Storage Provider - Container name matches your Key ID
Step 4 — Ensure Signing Agent is Running
Section titled “Step 4 — Ensure Signing Agent is Running”Verify the agent service is active:
Get-Service QCecuring-Code-Signing-AgentStatus should be:
RunningIf not running:
Start-Service QCecuring-Code-Signing-AgentStep 5 — Sign the Executable
Section titled “Step 5 — Sign the Executable”Sign using the certificate thumbprint:
signtool sign ` /sha1 <Thumbprint> ` /fd SHA256 ` app.exe
Optional timestamp:
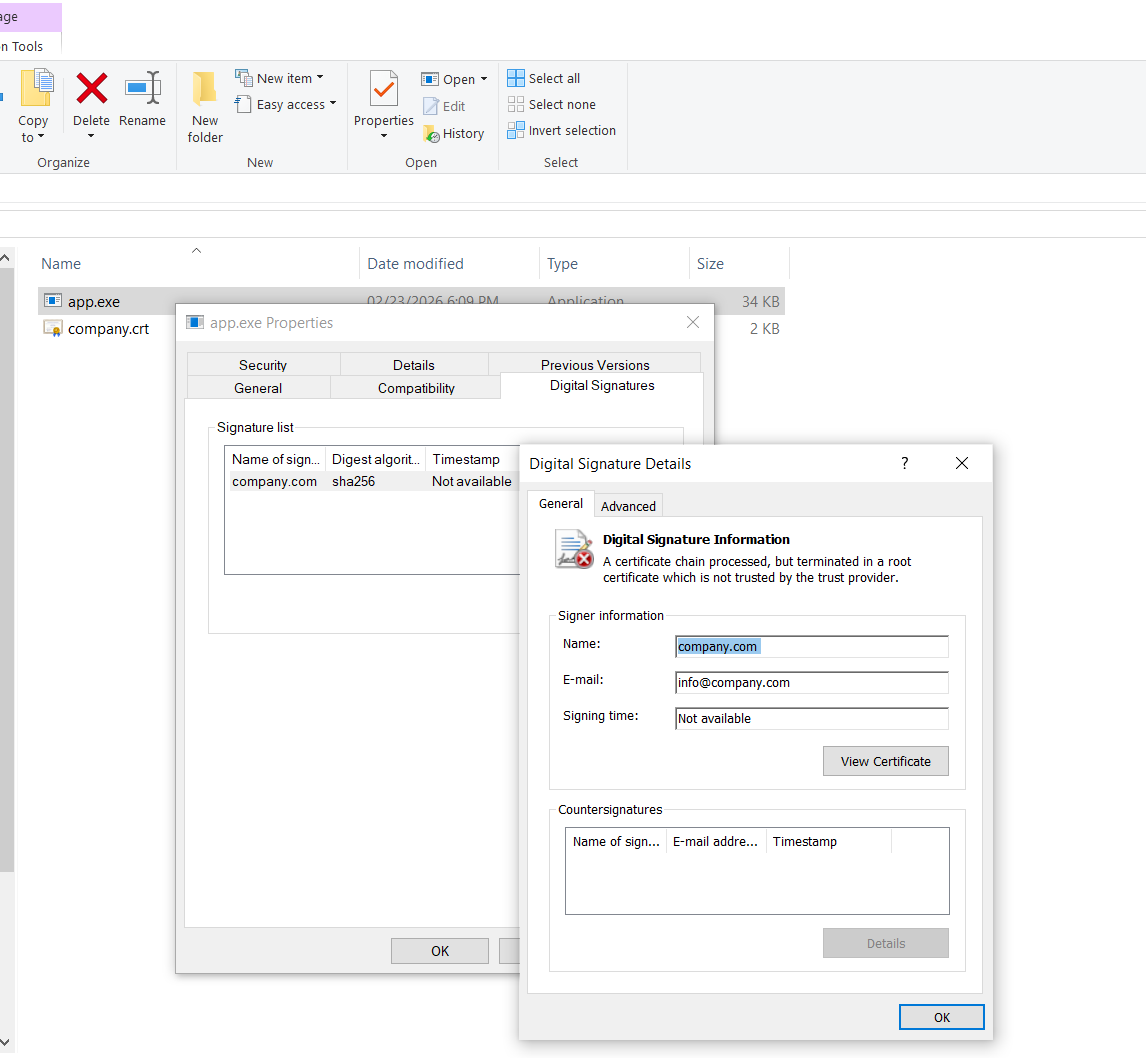
signtool sign ` /sha1 <Thumbprint> ` /fd SHA256 ` /tr http://timestamp.digicert.com ` /td SHA256 ` app.exeStep 6 — Verify the Signature
Section titled “Step 6 — Verify the Signature”signtool verify /pa /v app.exe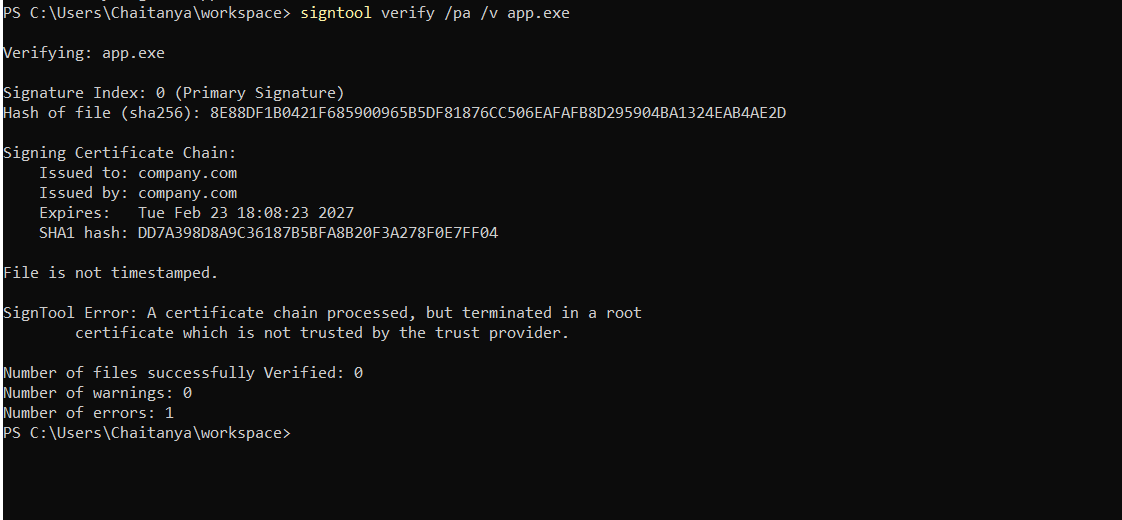
Expected result:
Successfully verifiedAdditional verification view:
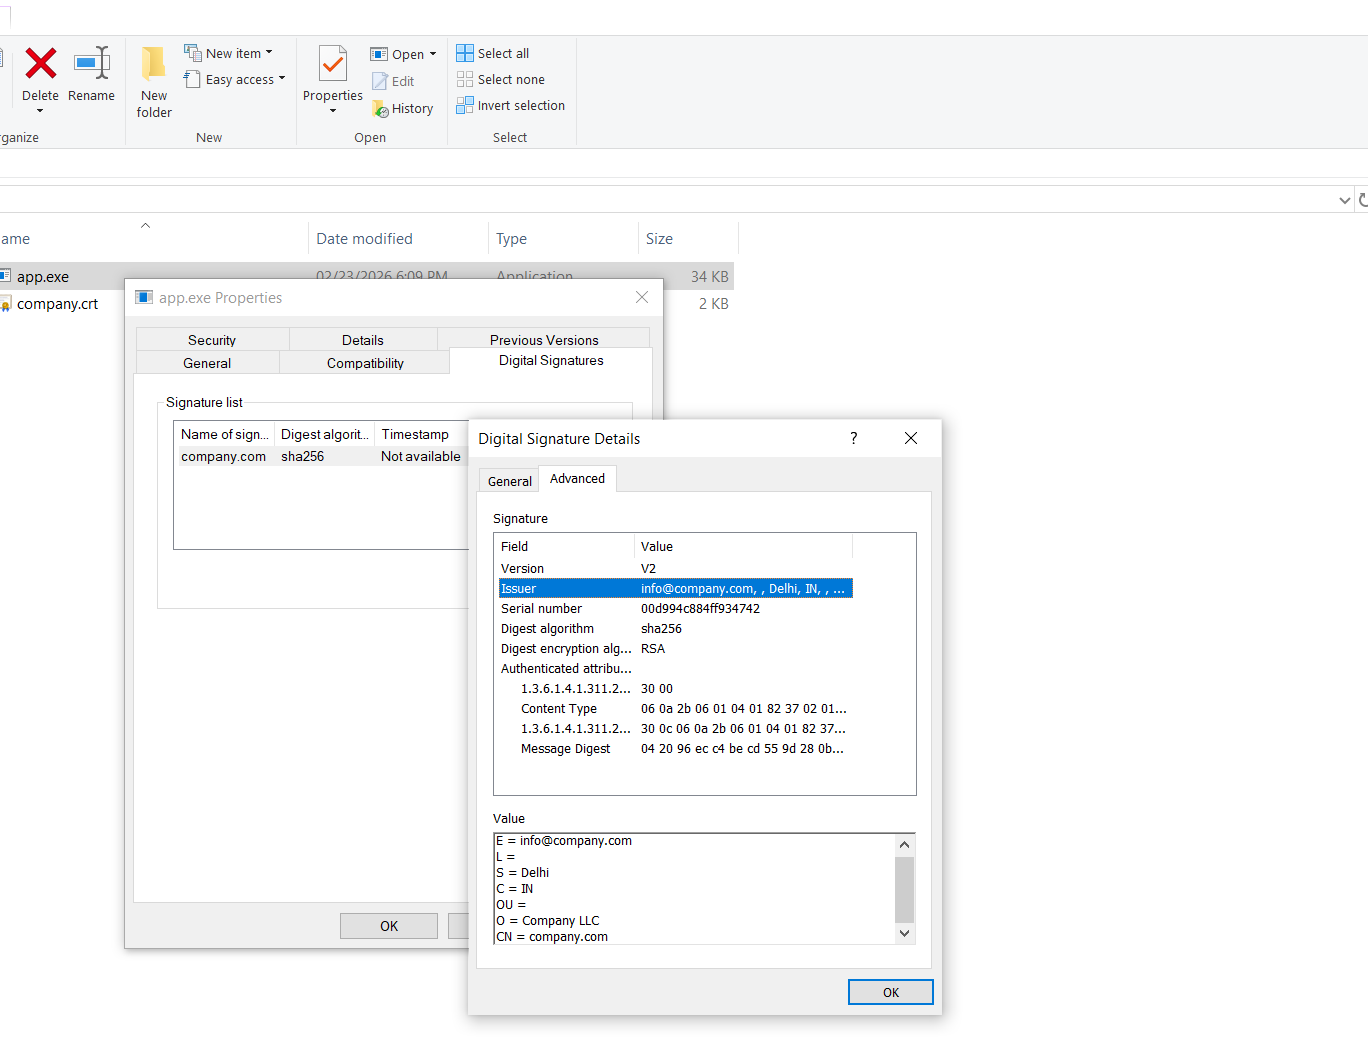
Creating a Self-Signed Certificate (Testing Only)
Section titled “Creating a Self-Signed Certificate (Testing Only)”You may generate a test certificate in QCecuring for development purposes.
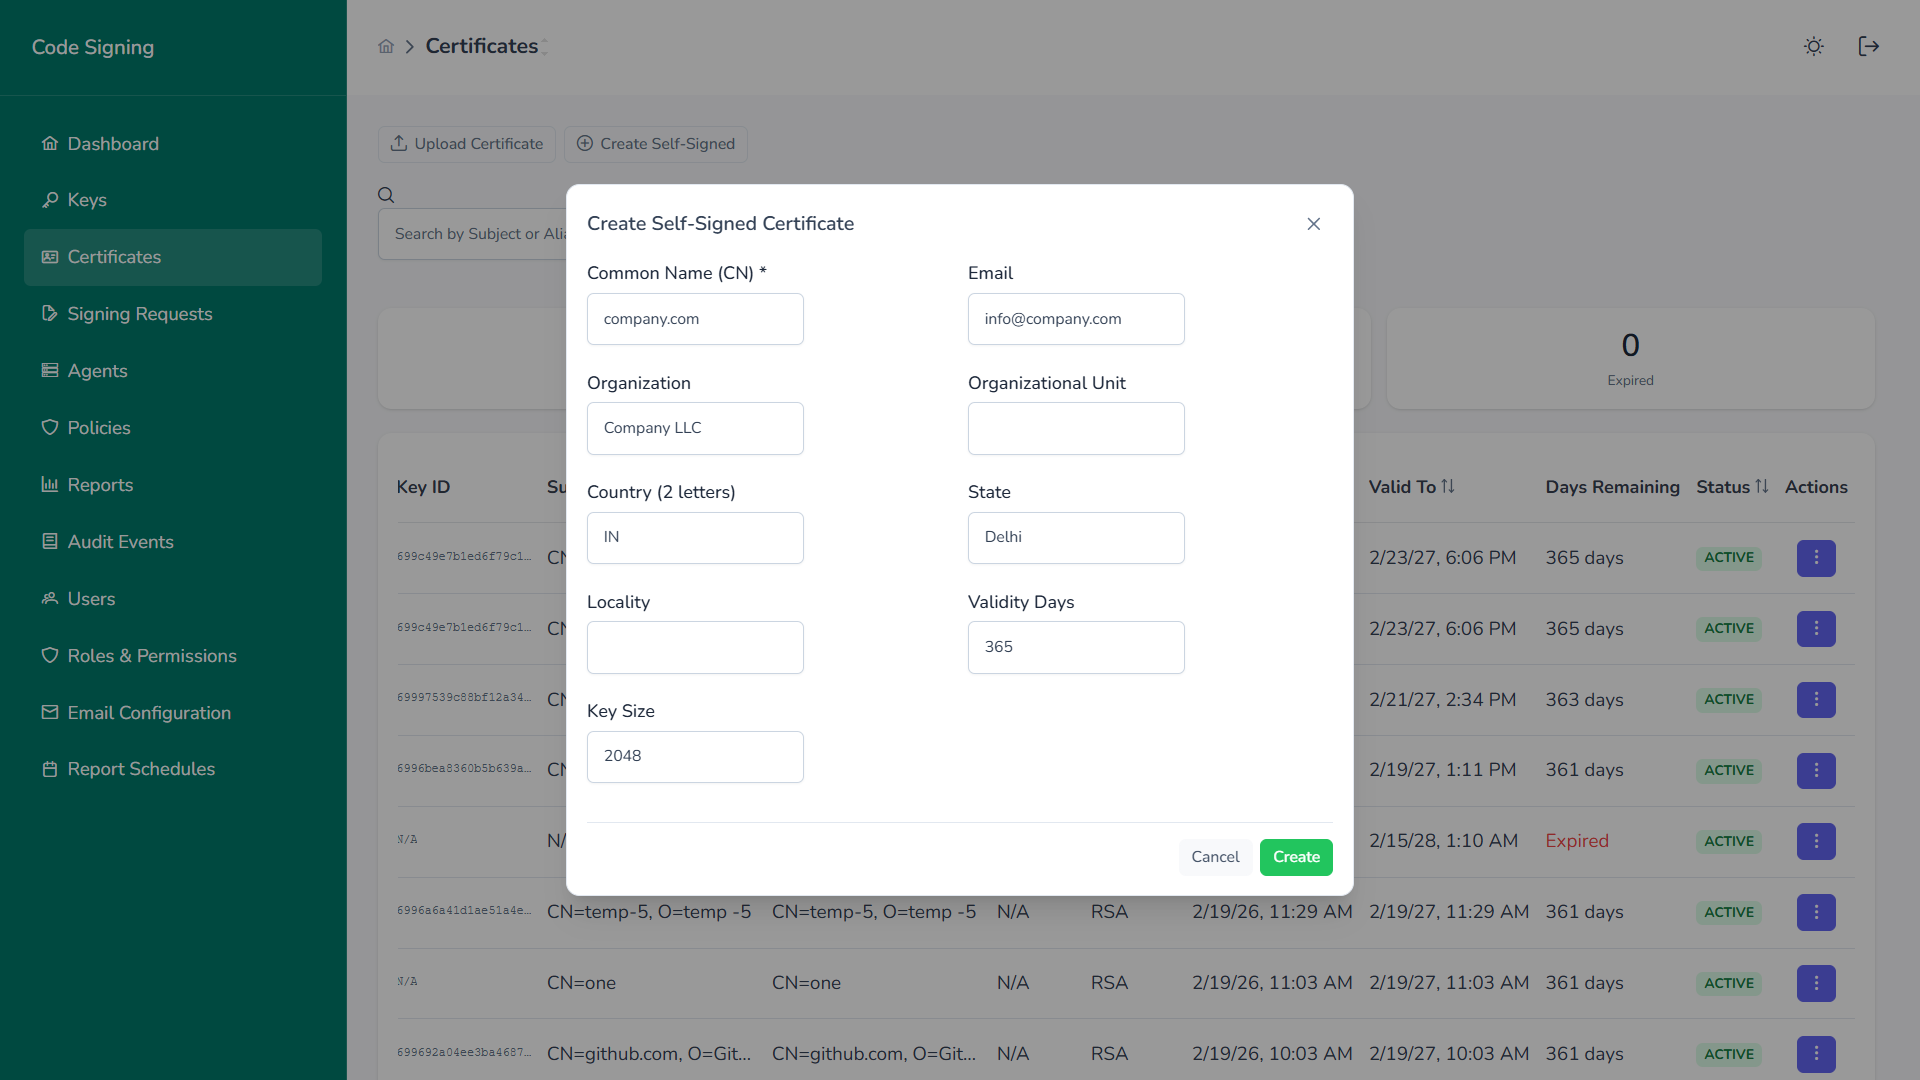
Production environments should use publicly trusted code signing certificates.
Troubleshooting
Section titled “Troubleshooting”Certificate Not Found
Section titled “Certificate Not Found”- Confirm certificate exists in
Cert:\CurrentUser\My - Verify correct thumbprint
- Confirm provider is QCecuring KSP
Signing Fails
Section titled “Signing Fails”- Confirm Signing Agent is running
- Check backend platform health
- Verify key permissions and policy approvals
Timestamp Errors
Section titled “Timestamp Errors”- Verify outbound internet access to timestamp server
- Confirm
/trURL is correct